 The light in the upper left corner is pointed at the background, the other lights are on the models. They did some battle scene poses, including Emily as Black Rock Shooter with the sword, and Kori as Dark Master in a fighting stance:

Then we needed one that could show Dark Master jumping/flying through the air, so Kori did this:
 Having her balance on the boards was just a quick way to get the pose to look a little more like jumping/flying and less like just standing on the ground, but the hair doesn't look right for the final scene, and she's looking at the camera instead of to the side, so later I combined the lower part of this photo with the upper part of the previous one.
Then I took a photo of a building for the background. Luckily I found a building that had the type of checkerboard pattern that is often used in Black Rock Shooter.
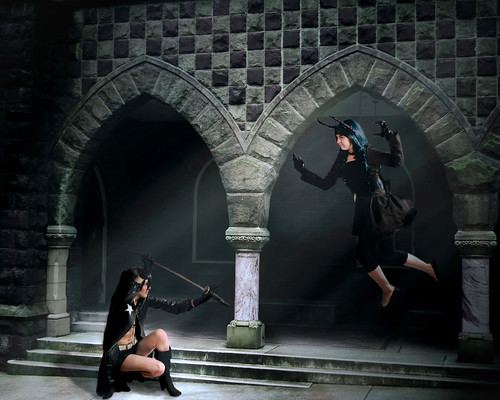
 I put these all together in Photoshop, cleaned up the background, mirror-imaged the other shots and combined the two Dark Master shots into one. Then I re-colored and re-lit everything. For initial background re-lighting I used Filter > Render > Lighting Effects. I used adjustment layers to approximately match the colors and brightnesses. Then most of the final additional coloring, lighting and shadowing was painted in by hand.
 Here's the final result:
This was really fun. There's a lot I still need to learn in creating composite scenes like this, but I hope this post may encourage other photographers to try something like this.